Camper FAQs is reader-supported. Buying through links on our site may earn us an affiliate commission. As an Amazon Associate I earn from qualifying purchases.
To winterize a camper for full-time living, you need to control the basement and wet bay temperature and ensure the rig is properly insulated, including windows, doors, plumbing, etc.
Here’s the step-by-step process to properly winterizing a camper to live in.
Important: You still need to winterize your RV if you live in it, which is what I detail step-by-step below. However, if you plan to store your camper over winter, check out our guide on How To Winterize A Camper for storage.
Step 1: Inspect and Seal the Exterior
The first thing we need to do is inspect the exterior of your camper, paying close attention to windows, doors, and any other openings. All the insulation in the world won’t help if your RV has large gaps or cracks to the outside.
Seal gaps or cracks with weather stripping or caulk to prevent cold air from entering and maintain a warm interior.
Step 2: Insulate Your Camper
Invest in quality insulation materials for your camper’s walls, windows, floors, and ceilings.
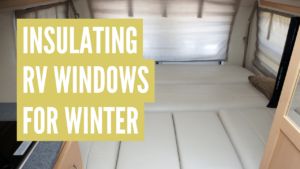
- Installing RV window insulation, like thermal curtains or applying insulating film, will help reduce heat loss through windows.
- Lay down thick carpet, rugs, or foam floor tiles.
- Install a draft snake on exterior doors.
- Place insulated covers over skylights and AC vents.
Combine as many of these insulating tips as possible to help your camper retain heat in frigid temps.
Step 3: Skirting Your Camper
Skirting your camper can minimize heat loss through the floor and create a barrier against cold air and wind.
You can buy pre-made skirts for your camper, which are typically panels you attach to the exterior of your RV, or inflatable air skirts that use trapped air as an insulator.
You can also make your own skirting with insulated foam panels, particle board, or vinyl billboard.
Tip: Don’t forget about the underside of slideouts. If you can’t skirt around the slideout, tape insulating foam boards to the underside.
See our guide to insulating a camper for winter living for more insulating tips and tricks.
Step 4: Protect Plumbing Systems
Protecting the plumbing system of your RV is crucial, as it’s the number one reason for damage during the winter months due to frozen pipes bursting
To prevent water systems from freezing:
- Use heat tape or pipe wrap insulation on exposed water lines. If the temps get extremely cold in your area, you may want to use a pipe heating cable kit.
- Insulate your freshwater and holding tanks, and consider adding holding tank heaters for added protection.
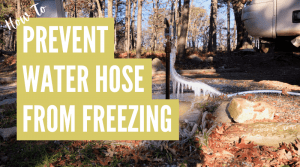
- Instead of leaving your RV hooked up to city water, fill up your freshwater tank and immediately store the hose somewhere warm after. If you leave your hose hooked up, use a heated water hose.
- For your blackwater and greywater tanks, add anti-freeze to keep the contents from freezing and damaging your tanks. And don’t forget to add more every time you empty the tanks.
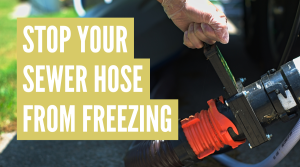
- Keep your sewer hose from freezing by wrapping it with heated cable and pipe wrap insulation.
See how to keep RV pipes from freezing for more information.
Step 5: Prepare for Emergencies
Stock up on essential supplies, such as extra blankets, sleeping bags, warm clothing, gloves, non-perishable food items, and bottled water. Keep a well-stocked first aid kit and ensure you have a reliable cell phone for emergencies.
Tip: Have a blow dryer handy at all times in case the water lines freeze over.
Step 6: Regularly Inspect Your Camper
Throughout the winter, regularly inspect your camper’s exterior, heating systems, and plumbing to ensure everything looks good and is working properly.
Tips for Living in a Camper During Winter
Once you’ve properly winterized your RV for full-time living, the work doesn’t stop there. Here are some important tips for maintaining camper comfort in frigid temps.
- Monitor Propane Tanks: Regularly check your propane levels, and keep a reserve tank on hand to avoid running out, especially if propane is your main fuel source for heating and cooking in your camper.
- Protect the Exterior: Remove ice and snow buildup from the roof, windows, and other surfaces to prevent damage to your camper. Heavy snow accumulation can lead to leaks or structural issues.
- Use the Fresh Water Tank: Fill your water tanks using a heated hose, then pack the hose away to prevent freezing. Rely on your fresh water tank for your water needs during freezing temperatures.
- Protect Your Motorhome Engine: For motorhome owners, ensure the engine is well-maintained and winterized. Use a diesel anti-gel supplement, check antifreeze levels, and consider an engine block heater in extremely cold temps.
- Good Ventilation is Essential: Proper ventilation helps prevent mold growth caused by excess humidity from cooking, showering, or other activities. Use vent fans or crack-open windows to maintain healthy air circulation.
- Don’t Let Stabilizing Jacks Freeze: Prevent your stabilizing jacks from freezing to the ground by placing a wood block or other insulating material beneath them. This makes it easier to move your camper if needed.
- Always Have a Generator On Hand: A reliable generator is essential as a backup energy source, especially during winter when power outages or battery drains are more likely. Ensure your generator is well-maintained and ready for use during emergencies.
- Add Supplemental Heat to Wet Bay: Some RVs have heated wet bays, but if yours doesn’t, you may want to add a supplemental heat source, like a temperature-controlled space heater, to help prevent the freezing of components.
- Park in an Open Area: Whenever possible, choose a parking spot with ample sunlight exposure. The sun serves as a natural heat source, warming your camper during the day and reducing the need for additional heating.
- Check RV Park Rules & Regulations: Before undertaking any DIY winterization projects, ensure you review your RV park’s rules and regulations. Some parks may have restrictions on modifications, skirting, or the use of certain heating devices. Complying with these guidelines will help you avoid potential issues or fines while enjoying your winter stay.


Thank you for this info. I am preparing to spend my first winter in a 5th wheel in a cold climate. I am concerned about the pipes. Your information gave me some hope it can go well.
Thanks Diane! The pipes, and your entire plumbing system, are a valid concern. Since its you first winter doing this I’d just be extra diligent in inspecting everything and quickly reacting if necessary. You’ll learn a lot this winter.
We have been in our travel trailer and winterized for living in it just until tomorrow. We’re in MN….. fortunately the weather has been unusually warm for this time of year!!
Now we can head to warmer weather!!
I’m just a little south of you in Iowa, and you’re right, it has been a very nice and warm fall so far! Enjoy the warmer weather when you get there!