
Camper FAQs is reader-supported. Buying through links on our site may earn us an affiliate commission. As an Amazon Associate I earn from qualifying purchases.
With the right preparation, winter camping can be a fun and exhilarating experience!
And if you’re not prepared? Well… it’s likely to be a cold and miserable one.
So, let’s look at 15 of the best tips on how to keep a camper warm in the winter to ensure that your next cold-weather trip is a fun (and warm) one!
1. Insulate Your RV Floors
Insulating your camper for winter use is key to keeping it warm. And installing floor insulation between the subfloor and flooring is one of the most important steps in doing just that.
Floor insulation will reduce not only heat transfer but also engine noise and vibrations while you are on the road.
When it comes to insulating your vehicle’s floor, you have a few options, mainly:
- Foam board insulation: This type of insulation has a higher R-value than automotive insulation, but its thickness and rigidity make it difficult to install.
- Automotive insulation: While automotive insulation has a relatively low R-value, it is flexible and easy to install. This insulation also has a vapor barrier and a high weight-bearing capability, making it the ideal material for your RV floor.
While both options are effective at insulating your floor, if you’re going to DIY the installation, then I recommend going with automotive insulation. It’s easy to work with (just cut it with scissors) and it’s easier to lay down in the odd nook and crannies of an RV.

Automotive Lightweight Thermal Insulation – Sound Deadener & Heat Barrier Mat
Price:Clicking this link to make a purchase may earn us a commission at no additional cost to you.
To install automotive installation, you’ll need (products link to Amazon):
- Automotive insulation
- Spray adhesive
- Reflective tape
- Utility knife
- Scissors
- Straight edge
How To Install RV Floor Insulation
- Before installing the insulation, remove the old flooring and any furniture or appliances that might be in the way. Be sure to remove any staples and debris.
- Once the flooring is removed and the subfloor is clean, pick a corner of the RV to start in. Then measure and cut the first piece. Test fit the piece before spraying with adhesive.
- Once you are sure the piece of insulation will fit properly, take it outside of the RV and spray the back of it with the spray adhesive.
- Immediately go back into your RV and spray the floor where the insulation will go down with the spray adhesive. Be sure your RV is properly ventilated.
- Once the spray adhesive is tacky (only takes about a minute), lay it down in the designated spot. Apply firm pressure all over the top of the insulation.
- Repeat the above steps for the rest of the RV floor.
- Cover all of the seams with the reflective tape.
- Now you’re ready to install your new flooring!
Overall, it’s a simple process with huge results! The heat savings, sound deadening, and vapor blocking properties of the insulation will make it more than worth the time it took to install.
2. Insulate Windows And Doors
Your RV’s single-pane windows and doors are where you lose most of your heat during the winter. A draft around your windows and doors is a tell-tale sign that you need to increase their insulation capabilities. Luckily, we have a few options to keep the cold air out and the heat in!
Replace Caulking & Stripping
If you have a limited budget, re-caulking your windows and replacing the weather stripping around your doors and windows are affordable and practical solutions to retain heat. New weather stripping will insulate your camper for two to three years before it starts deteriorating. Regularly replacing your weather stripping will contribute to a warm and comfortable cabin.
Apply Window Shrink Insulation
Window shrink insulation kits are commonly used in homes, but they can be used on you RV windows, as well!
The shrink insulation goes on clear, so you can still see out of your windows, only takes a few minutes to install, and saves up to 35% of heat loss.
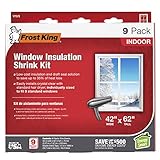
Frost King Indoor Shrink Window Kit
Price:Clicking this link to make a purchase may earn us a commission at no additional cost to you.
Keep Windows Covered At Night
If the sun is shining, uncover your windows so that the sunlight can enter and heat the interior of your camper. When it is cloudy or when the sun goes down, cover your windows with insulation boards or insulated curtains.
Upgrade Your Windows
The most effective way to reduce heat loss from windows is to upgrade them to more energy-efficient models.
This is going to be the most expensive solution, but you won’t have to worry about covering your windows. And since most of the heat loss in your camper is through your windows, this change alone can make a world of difference.
Tip: Check out our detailed guide on insulating RV windows for winter camping for more ideas!
3. Opt For A Smaller RV
High energy usage is one drawback of heating your camper during winter. If you go on regular camping trips during the colder months, your energy costs will ramp up over time. With a smaller RV, you will use less propane and electricity, thus reducing your camping costs.
Purchasing a smaller camper is the ideal solution if there are only a few of you. For families of five or more, going smaller might not be a viable option.
If you decide to make the switch to a smaller RV, look for models with winter camping features. These include additional insulation, dual-pane windows, and an efficient heating system. Some modern RVs come with skirting that you can install to prevent heat loss through the undercarriage.
4. Install RV Skirting
RV skirting is material that you place around the bottom of your camper to keep cold air from entering the undercarriage. Depending on the type of skirting, it can also provide valuable storage space and add aesthetic appeal.
The attachment method is a critical consideration when choosing skirting for your RV. For example, with a channel system, the top of the skirting slides into an aluminum channel to form an airtight lock.
Other skirtings have buttons, T-snaps, or suction cups to keep the skirting in place, which doesn’t seal in heat, as well.
When shopping for skirting to keep your camper warm in winter, insulation is critical. Ideally, your skirting should feature insulation materials. The method of attachment to the RV and the skirting’s ground anchor should form a tight seal to prevent heat exchange.
Tip: If your RV skirting is non-insulated, place foam board insulation materials behind the skirting material and connect them using zippers or Velcro.
5. Prepare Your Pipes & Tanks
When camping in the winter, the water in your RV’s system can easily freeze, which increases the risk of damage to your pipes or tanks. With thorough preparation, you can keep your RV pipes from freezing and make your winter camping experience more comfortable.
Winterizing your camper is critical when preparing your pipes. This process includes:
- Removing and bypassing your in-line water filters
- Draining the gray and black water tanks
- Draining the water heater and lines
- Bypassing the water heater
- Adding antifreeze to your water system
If you plan on pulling your winterized camper out for use during the winter months, leave it as-is while traveling to the campground.
When you arrive at the campsite, be sure to fully flush the anti-freeze out and fill the freshwater tank (not completely full to allow some room in case it freezes).
To prevent pipe and tank freeze while you’re camping, you can:
- Keep exterior water hoses and even your sewer hose warm by attaching a heat cable lengthwise to your hoses and wrapping them in pipe wrap insulation. Then cover the insulation with all-weather tape to hold it all together and protect them.
- Ensure your water tanks are at least 25% full to help keep them from freezing over. And you can apply a holding tank heater pad to your tanks to ensure they don’t freeze over.
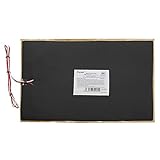
Facon 12″ x 18″ RV Holding Tank Heater Pad
Price:Clicking this link to make a purchase may earn us a commission at no additional cost to you.
Check out our guides on how to keep RV pipes from freezing and how to keep your RV water hose from freezing for more ideas and tips.
6. Use Solar Panels
With solar panels, you can convert the sunlight into usable electricity for your RV. This energy source is ideal for powering various appliances, including heaters and electric blankets. Solar panel installation is ideal for your camper if you don’t have access to electric hook-ups and you want to save on propane.
Selecting the right solar panels, inverter, charge controller, and other components for your rig requires extensive research. You want to ensure that your solar panel system can power all your appliances and devices, not just your heating equipment.
Related: How to Hook up Solar Panels to RV Batteries
The panels you choose should have the highest possible efficiency to cater to your needs while using winter’s low light intensity. Monocrystalline panels have a higher efficiency rating than polycrystalline panels, but monocrystalline panels generally have a higher price tag.
Here’s a great video on how to set up a basic solar-powered system in your RV.
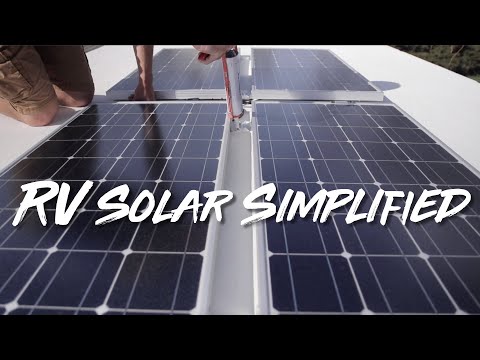
The solar kit used in this video:

Renogy 400 Watt 12 Volt Monocrystalline Solar Starter Kit
Price:Clicking this link to make a purchase may earn us a commission at no additional cost to you.
7. Use Blinds, Curtains, And Carpets
Window shades, curtains, and rugs provide you with additional thermal layers to retain your camper’s heat. These solutions are cost-effective, and they are easy to install. Most suppliers can measure and cut UV-block shades, curtains, and rugs to ensure a custom fit.
In combination with floor insulation, a thick rug or carpet will block the cold air that circulates underneath the camper. The right carpet will also give your interior a homey feel and add to its aesthetic appeal.
Shades and curtains help keep your camper warm by preventing cold air from seeping through the windows.
Tip: On sunny days, open the curtains to allow natural light and the sun’s warmth to enter the RV. At sundown, close the curtains to help insulate the windows and keep the heat in your camper.
8. Sleep On An Electric Blanket
During the day, you move around and focus on your camping activities, which makes the cold more bearable. At night, however, temperatures drop and additional measures are necessary to keep you warm and comfortable.
An electric blanket is the ideal camper accessory to keep you warm at night. If you have an electric blanket, you can switch off your furnace or electric heater (or turn on low) to save gas and electricity. To use your electric blanket, you will need access to an electrical outlet or solar PV system with sufficient capacity.

Sunbeam Heated Blanket
Price:Clicking this link to make a purchase may earn us a commission at no additional cost to you.
With an electric blanket, safety is critical. Keep the temperature setting as low as possible, and remember to switch off the blanket when you wake up the next morning. If you leave your electric blanket on and unattended, the electric arc of a broken conductor or overheating element can cause a fire.
9. Use A Portable Heater
Portable RV heaters are compact and lightweight but emit sufficient heat to keep your camper warm.
While there are several different types of portable heaters, the two most popular and effective are electric heaters and propane heaters.
Propane-Powered Heaters
Propane-powered heaters are generally efficient and cheaper to run than electric ones. With a propane heater, however, you will need to take enough propane on your trip as fuel (check out our guide titled how long does propane last in an RV to calculate how much propane you will need). Another drawback of a propane heater is that it’s unreliable at elevations of 6,500 feet or higher above sea level.
What to look for in a propane heater:
- An Oxygen Depletion Sensor (ODS) to shut the heater off if oxygen levels in the camper get too low
- Auto shut-off feature if the heater tips over or the pilot light goes out
- Fire-resistant casing

Mr. Heater Buddy Indoor-Safe Portable Propane Radiant Heater
Price:Clicking this link to make a purchase may earn us a commission at no additional cost to you.
Electric Heaters
Electric heaters can be a good way to provide consistent, reliable heat for your camper when used properly.
They don’t consume any oxygen and don’t produce carbon monoxide. Plus, you won’t need to haul any propane canisters on your trip!
They do require an electric hook-up, of course, making them unsuitable for off-grid camping unless you have a generator.
What to look for in electric space heaters:
- Automatic shut-off if it gets knocked over
- Overheat protection
- Made with fire-resistant materials

Heat Storm Phoenix Infrared Space Heater
Price:Clicking this link to make a purchase may earn us a commission at no additional cost to you.
These appliances are portable and cost-effective, but electric heaters do carry some risk.
10. Use Your RV Furnace Effectively
A camper furnace is a built-in heater that is almost always powered by propane. It doesn’t take up any valuable floor space, and some models can double as water heaters.
Proper furnace usage is central to keeping your camper warm in the winter. Ensure optimal efficiency by understanding how an RV furnace works and performing regular maintenance.
You should also be scientific about your temperature settings. Experiment with different evening and daytime settings and evaluate your energy usage and indoor comfort to find the optimal temperature levels.
11. Install A Heat Pump
An RV heat pump emits dry, warm air to reduce humidity levels and raise the temperature level inside your camper. Air-source heat pumps are becoming increasingly popular among RV owners, as they also function as an air conditioner during the summer.
There are two types of RV heat pumps: ducted and non-ducted. Ducted heat pumps are ideal for large campers, as they can efficiently control the temperature inside your rig. They can also individually control the temperature throughout various sections of your vehicle.
If you have a relatively small camper, a non-ducted heat pump is better. This type doesn’t require any piping, and the air blows from the unit’s air vents. These units are quick and easy to install, and they are more portable than ducted models.
All heat pump types require electricity to run, so you will need to camp at a place where there is an electric outlet. An extensive solar panel system with battery storage can also power your heat pump at night.
So, should I use my RV Furnace or a heat pump?
The main difference between an RV heat pump and an RV furnace is that your heat pump uses electricity and your furnace uses propane. So, what you decide to use is up to you. If you’re staying at a campground with electrical hook-ups, it might make more sense to use your heat pump. With that said, some people just like the feeling of the heat that propane produces.
12. Wear Warm Clothing
Warm clothing goes a long way toward keeping you warm and comfortable when camping in the winter. Have two or three pairs of thermal underwear and thermal socks on hand for sleeping and wearing underneath your clothes during the day.
You should also wear a pair of socks or slippers when you spend time inside your RV. By keeping your feet warm, you promote the redistribution of heat around your body, making it easier to cope with the colder temperatures.
Planning is critical to ensuring that you have clean, warm clothes every day. Also, make sure that you can wash and dry your clothes at the camping ground.
13. Locate And Seal Exterior Air Leaks
In addition to your camper door, windows, and vents, there are various openings for wires, cables, and components through which cold air can enter your cabin. Sealing these openings with a spray foam insulation or silicone rubber will optimize the efficiency of your heating appliances.
Locating these openings can be challenging, especially if you don’t have a ramp or adequate lighting. Some of these openings are obscured from view, and you may need to consult a diagram from the camper’s manufacturer. When you do find an opening, you must apply the insulant correctly, so it’s not too restrictive for its purpose.
Alternatively, you can take your camper to your nearest RV service center and ask them to seal the openings for you.
14. Make A Draft Stopper Snake
A door snake is a long fabric tube, similar to a sock, that you can fill with rice and place in front of an opening.
If drafts and even snow seep in at the bottom of your RV door, you can place your rice-filled snake in front of the opening to block the draft.
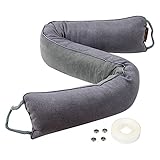
Door Snake Draft Blocker Heavy Duty Insulation
Price:Clicking this link to make a purchase may earn us a commission at no additional cost to you.
Many people use their snakes as décor to add some personality and color to their camper’s interior.
15. Manage Condensation
Managing condensation is an honorable mention in this list. While it won’t keep your camper warm, condensation build-up can be a result of insulating your camper to keep it warm. And excess condensation can be very bad for your camper (and your health).
When you insulate your camper to retain heat, water vapors from cooking, showering, laundry, and breathing have nowhere to go, and your indoor humidity increases. Condensation on your windows and other cold surfaces indicates high humidity in your camper.
The buildup of moisture inside your RV can damage its interior and cause mold growth. Mold is particularly problematic as it is a health hazard and expensive to remove.
Opening a window to get rid of water vapors is not an option, as it will render your efforts to warm the camper worthless. Instead, run a dehumidifier inside your RV to extract the moisture in the air.
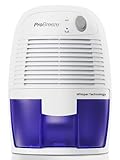
Pro Breeze Electric Mini Dehumidifier
Price:Clicking this link to make a purchase may earn us a commission at no additional cost to you.
If possible, use the camping ground’s facilities for showering and doing laundry. You should also try to cook outside or use an RV cooking appliance that retains excess moisture. If you notice condensation or water from other sources in your camper, wipe it down immediately to ensure that interior surfaces remain dry.
Check out our detailed guide on how to keep moisture out of an RV for more tips and tricks!


Thank you!