Camper FAQs is reader-supported. Buying through links on our site may earn us an affiliate commission. As an Amazon Associate I earn from qualifying purchases.
If you’ve owned a fiberglass RV or camper for any number of years, then you’ve more than likely noticed it lose its shine.
And in more extreme cases, it even turns a chalky, cloudy, or yellowish color.
Unfortunately, this can make your RV look old and dilapidated even if you’ve taken great care of your vehicle.
So, let’s look at what causes your RV to become dull and unsightly in the first place. Plus, the exact steps you should follow to get that new RV shine back!
What Causes Oxidation On Fiberglass?
Oxidation happens when the gel coat covering your RV reacts with oxygen in the air.
The oxidation process is accelerated by several factors, such as excessive heat, direct sunlight, air pollutants, and too much water.
You can slow down the oxidation process by regularly covering the gel coat with wax. However, the problem is that this wax also decays with time, so its protection is only temporary.
So, how do you remove oxidation from fiberglass?
How To Remove Oxidation From RV Fiberglass
To restore the luster and shine of your RV, you need to remove the effects of oxidation. You have two main options here – removing by hand or by using a power buffer. Let’s break down each option.
Option 1: Hand Buffing
I recommend this method only if your RV fiberglass has a minimal amount of oxidation. Removing heavy oxidation from fiberglass using only arm power can be extremely difficult.
In this video, Wade shows exactly how to remove oxidation from fiberglass using the hand method and fiberglass restorer. It’s a simple 3 step process that includes:
- Applying the fiberglass restorer to a non-scratch kitchen sponge.
- Buffing the RV by hand.
- Wipe off the product with a clean rag.
You can use the restorer Wade mentioned in the video or use one of our recommended products:
- RV Finish Restorer with Wax (The product Wade used)
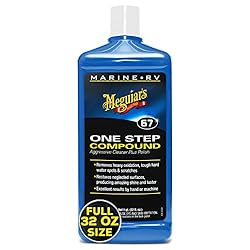
- Meguiar’s One Step Compound
- MEGUIAR’S Marine/RV Fiberglass Restoration System
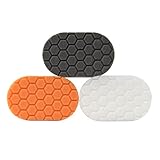
- Chemical Guys Hex-Logic Hand Applicator Pad Kit
Option 2: Power Buffing
A quicker, simpler, and much easier on your arms way is to use an electrical power buffer.
This video will show you step-by-step how to use an electrical buffer to remove oxidation from your RV fiberglass.
Recommended products for power buffing your RV:
- Meguiar’s One Step Compound
- MEGUIAR’S Marine/RV Fiberglass Restoration System
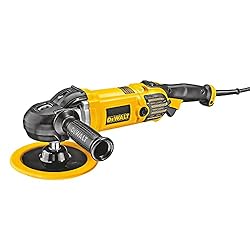
- DEWALT Buffer/Polisher
How To Restore Extreme Fiberglass Oxidation
Dealing with extreme oxidation of fiberglass can be tricky. Lack of regular care and aging can result in extreme oxidation damage that’s hard to deal with.
One of the most efficient ways to deal with extreme oxidation of fiberglass is wet sanding. However, it should only be used as a last resort. In other words, if the two methods above don’t get the results you want, then it may be time to consider wet sanding.
Wet sanding functions by removing the outer layer of the wax coating that was damaged by oxidation. The wet sanding process consumes enormous amounts of time. And if you’re not careful, you might accidentally harm the fiberglass outer layer.
Important: Check with a professional if you don’t know how to go through the process of wet sanding.
Getting Started
First, you’ll have to make sure you have the needed tools for the process, with sandpaper being the main tool.
Lighter oxidation requires sandpaper of about 2500 grit. While extreme fiberglass oxidation may require a grit size of 1200-1500 to work.

54pcs Wet Dry Sandpaper Assorted 3000/2500/2000/1500/1200/1000 Grit
Price:Clicking this link to make a purchase may earn us a commission at no additional cost to you.
When you’re using the coarser sanding paper, you’ll need to be very careful. The outer layer of the fiberglass might be affected or scratched by the sanding paper with a lesser grit size.
Once you have the correct grit sandpaper for the job, the next step would be to put it in some water and let it soak for about a day. Optionally, add in some automotive soap which helps in preventing the sandpaper from damaging the paint.
Step One: Wash Your RV Thoroughly
Before you start sanding, thoroughly wash your RV. This will help remove any air pollutants or debris from its outer layer.
It’s suggested that you wash your RV using normal automotive soap. Make sure to avoid adding any wax or polish to the soap. Once it’s cleaned, give the RV a good rinse with a hose.
It’s okay if you don’t dry your RV after washing it and before you start the sanding process. The moisture is actually beneficial, as it protects the paint from damage by keeping the sandpaper cool.
Step Two: Wet Sand The Fiberglass
Start the sanding process by applying a little pressure and increasing that when needed if it doesn’t seem to make an immediate difference. Unbalanced sanding that results in an uneven surface is one of the main issues you have to take care of. You’ll need to be consistent while applying pressure with the sandpaper on the surface.
For best results:
- Don’t use your hand or fingers to hold the sandpaper. Your hand might result in an uneven outer surface, thus an uneven sanding job. Instead, use a sandpaper block or something similar to create an even surface.
- In order to avoid damaging the paint of your RV in any way, you’ll have to make sure to keep the sandpaper moisturized.
- Use lighter sandpaper after using coarse sandpaper. It helps with any unwanted effect caused by the coarse sandpaper.
Step Three: Rinsing and Drying
When you’re done sanding, and the surface of your RV is even, you’ll need to rinse your RV. Rinsing helps remove any pollutants and unwanted elements from the surface of the RV. This process is essential as it prepares the surface for the polishing process.
After your RV is completely rinsed off and there is no evidence of sanding debris on the vehicle, we can start the drying process. Drying the surface or fiberglass of your RV is necessary to prepare it for the waxing and polishing process.
You can accelerate the drying process by using a towel or dry cloth to help further dry your RV’s surface. Before moving to the next step, the surface will need to be completely dry.
Step Four: Wax and Polish
Now that you’re done with drying and rinsing, it’s time to start the polishing process. Polishing the outer layer of the fiberglass will require that you use a polish product, like Meguiar’s One Step Compound.

Meguiar’s Marine/RV One Step Compound
Price:Clicking this link to make a purchase may earn us a commission at no additional cost to you.
There are two ways to apply the polishing wax, both of which we described above. To reiterate, you can use a buffer, which is super-efficient, but a bit expensive.

DEWALT Buffer/Polisher, Variable Speed, Soft Start, 7-Inch/9-Inch
Price:Clicking this link to make a purchase may earn us a commission at no additional cost to you.
Or you can use a towel or dry cloth to apply the product to the finish. This option will save you money, but it’s not as efficient and might result in an unbalanced surface.
Either way, apply the RV wax in a circular motion on the intended area. You might find that to finish the polishing process, you’ll need to apply it several times. Normally, using a buffer will help speed up the process.
After buffing the entire RV, simply wipe off any excess product with a clean rag.
Recommended Products
Here are reviews of our recommended products to make the oxidation removal process as easy as possible.
MEGUIAR’S RV Fiberglass Restoration System
The Meguiar’s RV Fiberglass Restoration System helps to restore fiberglass and gel coat in a powerful 3 step process.
This product contains an oxidation remover, a polish, and pure wax.
The oxidation remover removes light oxidation, scratches, stains, and water spots.
The polish revives color and creates a swirl-free deep shine.
And the pure wax will help enhance the color and provide long-lasting protection for your finish.
It’s made so that each bottle is 16oz, which means you get more coverage for your RV.
Pros
- It has an oxidation remover that will remove oxidation, stains, scratches, and more
- It has a high gloss polish that will make your RV shine
- Its pure wax provides lasting and durable protection to your RV
Cons
- It might leave off white and swirly streaks.

MEGUIAR’S Marine/RV Fiberglass Restoration System
Price:Clicking this link to make a purchase may earn us a commission at no additional cost to you.
MEGUIAR’S One Step Compound
Meguiar’s One Step Compound is a powerful oxidation remover that can be used by hand or with a machine.
The specially designed formula is perfect for both fiberglass and gel coat surfaces. And it leaves a high-luster shine in just one step.
And not only does it remove heavy oxidation, but it also removes scratches, stains, water spots, and restores paint color.
Pros
- Removes heavy oxidation from fiberglass and gel coat
- Only requires one step
- Can be used by hand or with a machine
- Removes scratches, stains, water spots, and restores paint color
Cons
- It’s a one-step product, which saves time but typically doesn’t give the same results as using a multiple-step product like the MEGUIAR’S RV Fiberglass Restoration System

Meguiar’s Marine/RV One Step Compound
Price:Clicking this link to make a purchase may earn us a commission at no additional cost to you.
DEWALT Buffer/Polisher, Variable Speed, 7-Inch/9-Inch
The powerful 12 amp buffer by Dewalt is one of the best buffer/polishers on the market today.
Get better finish results with the built-in electronic module which maintains specified speed under heavy load.
The powerful motor delivers 1250 watts and variable speeds of 0-600/0-3,500 RPM.
And the lightweight (6.7lbs) makes it easy to finish a long project, like buffing an RV, without tiring out your arms.
Pros
- 12 amp motor for maximum performance
- Variable speeds
- An electronic module that maintains and even speed for a smoother finish
Cons
- More expensive than other buffers (but worth it if you’re serious about buffing/polishing your RV)

DEWALT Buffer/Polisher, Variable Speed, Soft Start, 7-Inch/9-Inch
Price:Clicking this link to make a purchase may earn us a commission at no additional cost to you.
Chemical Guys Hex-Logic Hand Applicator Pad Kit
These applicator pads were designed to buff and polish vehicles! They are perfect for removing swirl marks, oxidation, and scratches.
And they can be used with any type of compound, wax, or polish.
Pros
- Designed to fit any small areas like doorjambs, handles, wheels, etc.
- Can be used with any type of compound, wax, or polish
Cons
- More expensive than regular kitchen sponges (but more effective).

Chemical Guys Hex-Logic Hand Applicator Pad Kit
Price:Clicking this link to make a purchase may earn us a commission at no additional cost to you.


Write a comment