
Camper FAQs is reader-supported. Buying through links on our site may earn us an affiliate commission. As an Amazon Associate I earn from qualifying purchases.
The freedom and joy you get from adventuring in a pop-up camper comes at a cost.
Every time you go camping outdoors or navigate dirt roads and muddy paths to reach a campsite, your pop-up camper acts as a magnet for dirt and grime.
Even if aesthetics are not your primary concern, failing to clean your pop-up camper might cause damage and costly repairs.
We understand this, so we put together a step-by-step guide on how to clean pop-up camper vinyl!
Important: This guide will focus on cleaning pop-up camper vinyl. If you want to know more about cleaning the canvas, check out our guide on how to clean pop up camper canvas the right way.
Step 1: Inspect Your Pop-Up Camper
The first step is also one of the most important ones. Take a close look at your pop-up camper and identify all the problem areas on the vinyl that might become an issue during cleaning.
Look for any residue, stains, and scratches that require more attention than standard cleaning. If you notice any stubborn and greasy stains or buildup from motor oil or other unidentified substances, prepare a multi-purpose cleaner that is vinyl-safe and will not damage the pop-up.
Also, note any cracks or holes in the vinyl. Cleaning is also an excellent opportunity to do some minor repairs on the vinyl, if necessary.
Finally, inspect the vinyl for any traces of mildew. Mildew spreads quickly and can have devastating effects on vinyl.
Step 2: Scrub Down the Vinyl Pop-Up
There are two ways to do this. One is to use a professional vinyl cleaning solution, and the other is a homemade mixture of water, dish soap, and bleach for stubborn stains.
Which is better? It depends. Homemade cleaning solutions like water and dish soap, in addition to being inexpensive and easy to prepare, will typically clean 99% of the stains you might have on your pop-up camper.
Brand name cleaners do a better job degreasing and removing stubborn stains and do not need as much elbow grease.
If you prefer the latter, I recommend using 303 Multi-Surface Cleaner. It’s an extremely powerful spray cleaner that is gentle enough for even the most delicate surfaces and fabrics.

303 Multi-Surface Cleaner
Price:Clicking this link to make a purchase may earn us a commission at no additional cost to you.
However, if you have the supplies on hand, you can simply start with a homemade solution and switch to a professional cleaner if you encounter areas you cannot take care of on your own.
Homemade Vinyl Cleaner Recipe
For the homemade solution, combine ¼ cup of dish soap (I recommend Dawn) for every gallon of water. You can add bleach if you see greasy/oily stains or residue.
Use a white eraser sponge or a soft-bristle brush to apply your homemade solution to the surface of the pop-up vinyl and scrub gently. Never use a harsh scrub brush or apply too much force. This will damage the vinyl and ruin its waterproof properties.
As mentioned above, if there are areas where the homemade solution and elbow grease do not help, use either a multi-purpose cleaner that is vinyl-safe or a professional vinyl cleaning solution from a reputable manufacturer.
303 Multi-Surface Cleaner
Price:Clicking this link to make a purchase may earn us a commission at no additional cost to you.
Step 3: Wipe Down the Vinyl
Next, we need to wipe the cleaner and residue off the vinyl. For this step, it is best to use a clean microfiber cloth or sponge and clean water. Gently wipe off all the soap and buildup until you can see the vinyl’s clean surface.
If you notice any leftover mildew that the soap and cleaning solution could not remove, use a professional mildew removal solution.
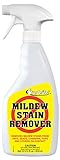
Star Brite Mold & Mildew Stain Remover + Cleaner
Price:Clicking this link to make a purchase may earn us a commission at no additional cost to you.
Step 4: Spot Check the Vinyl for Holes and Leaks
This is also a perfect time to spot-check for any cracks or holes that might cause leaks in your vinyl pop-up camper. If you find any areas that need repair, make sure to use a professional solution/adhesive. This is the only way to ensure that the integrity of your vinyl stays intact and that repairs will remain waterproof.
If you do notice some major cracks and holes that seem a bit too ambitious for home repair, do not hesitate to contact your camper manufacturer or your local RV dealer about repairing it.
Step 5: Add Protection
Once you have cleaned the vinyl, it is time to add a layer of protection. One of the biggest concerns is that over time vinyl becomes more rigid and prone to cracking due to exposure to the elements.
Protectant sprays, like 303 Marine & Recreation Aerospace Protectant, are the best choices for this task.
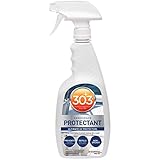
303 Marine & Recreation Aerospace Protectant
Price:Clicking this link to make a purchase may earn us a commission at no additional cost to you.
To use 303 Marine & Recreation Aerospace Protectant:
- Make sure the vinyl you are going to treat is out of direct sunlight.
- Spray the vinyl surface with 303 Marine & Recreation Aerospace Protectant
- Immediately wipe the vinyl completely dry
Important: Do not let the protectant spray come into contact with any canvas on your camper as it can damage it.
The shinier and more even finish you can achieve, the better the protection. Protectant sprays should last for at least a few months, depending on how often you use your pop-up camper.
Step 6: Let the Vinyl Dry Out and Close the Pop-Up Camper for Storage
We cannot overemphasize the importance of letting the vinyl pop-up dry properly: closing a still-wet vinyl pop-up is just asking for mildew.
If you do not use the camper often, you might discover the mold issue late, and the cost of replacing the vinyl can be costly.
So, ensure the vinyl is completely dry before closing the camper into its shell.
Step 7 (Optional): Clean the Camper Shell
Now that you have taken care of the soft vinyl of your pop-up and closed it securely, now is a good time to do the same for the camper shell that houses the pop-up.
You can use the same method and solution as with the soft vinyl but are free to apply more pressure.
Rinse off the dirty soap with clean water and dry with a cotton towel.
Add a protective coating with a spray or wax and buff it out evenly across the surface. Again, I recommend 303 Marine & Recreation Aerospace Protectant for that.
303 Marine & Recreation Aerospace Protectant
Price:Clicking this link to make a purchase may earn us a commission at no additional cost to you.
And with that, you are done!
How Often Should I Clean My Pop-Up Camper Vinyl?
This depends entirely on how often you use the camper and in what conditions. If you are very active and your pop-up often gets muddy and dirty, make sure to clean it thoroughly after every trip. Never close the pop-up camper for storage without first cleaning it and letting it completely dry.
Write a comment