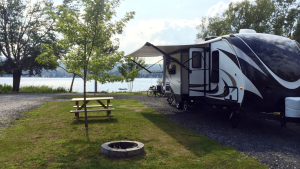
Our comprehensive RV setup checklist will guide you step-by-step, ensuring a seamless arrival and setup at your campground.
Tip: Download our Printable RV Arrival & Departure checklists and check off each of these steps as you complete them for a stress-free setup and teardown – no WIFI needed!
Arrival at Your Chosen Campground
Upon reaching your destination, follow these steps:
- Check-In and Get Your Campsite Number: Register at the campground office and get your assigned campsite number.
- Use Discount if Possible: If you have memberships with RV clubs like Good Sam, take advantage of these offered discounts.
- Confirm Campsite Has All Requested Amenities: Double-check that your site is equipped with the amenities you need for your stay, such as electricity, water, and sewage connections.
- Get a Map and Rules List for the Campground: Familiarize yourself with the campground layout and its regulations to ensure a smooth and respectful stay.
- Inquire About Points of Interest in the Area: Ask about local attractions, hikes, or events to make the most of your trip.
Arrival at Your Designated Campsite
Once at your site, run down this campsite setup checklist:
Pulling In
- Visually Confirm Site Has Needed Amenities: Do a quick visual survey of your campsite to ensure it’s equipped with all the necessary facilities, like power or sewage hookups.
- Plan Your Entry Path: Plan how you’ll maneuver your RV into position, be it pull-through or back-in.
- Inspect Campsite for Hazards or Obstructions: Check for potential obstacles like tree branches or rocks that could interfere with parking or setup.
- Park Your RV: Position your RV on the site, allowing enough room for slideouts and the awning. Be sure to keep kids and pets in your vehicle when you park, use a spotter to help guide you safely, and take it slow!
Exterior
- Turn on Your Emergency Brakes if Driving a Motorhome: Secure your vehicle by engaging the emergency brakes.
- Check to Make Sure You Can Reach Hookups: Verify that your RV’s cords and hoses can comfortably reach the site’s water, electrical, and, if applicable, sewer hookups.
- Level RV: Use leveling blocks or your RV’s built-in leveling system to ensure a stable and even living area.
- Connect to Shore Power: Plug in your electrical cord to the site’s power supply to run your RV’s electrical systems.
- Connect Water Lines: Hook up your water lines to access fresh water.
- Connect Sewer Hose: Attach your sewer hose to properly manage waste.
- Turn on the Propane: Turn on your propane supply to power your gas-powered appliances.
- Roll Out Awning: Unroll your awning, taking care to secure it safely.
- Lower Handrails and Entry Steps: Ensure safe entry and exit by lowering the handrails and steps.
- Campsite Setup: Arrange your outdoor furniture and accessories to create your perfect outdoor living space.
Unhitching (If Applicable)
- Chock Tires: Secure your RV from moving unintentionally by placing chocks around the tires.
- Put Support Blocks Down & Lower Jacks: Establish further stability by using support blocks and lowering the RV’s jacks.
- Disconnect the Electrical Cord from the Tow Vehicle: Detach the electrical connection from the tow vehicle to the RV.
- Disconnect the Breakaway Cable from the Tow Vehicle: Unhook the safety breakaway cable from your tow vehicle.
- Unhitch RV: Detach the RV from the tow vehicle.
Interior
Now, let’s prepare the inside of your RV:
- Extend Slideouts: Extend any slideouts your RV has to increase living space.
- Turn on the RV Refrigerator: Start cooling your refrigerator to store food safely.
- Turn on A/C or Heater: Based on weather conditions, turn on either the A/C or heater to maintain a comfortable temperature.
- Open Roof Vents: Promote good air circulation by opening your roof vents.
- Light Pilot on the Oven: If your stove has a pilot light, make sure it’s lit and ready for cooking.
- Turn on the Water Heater: Activate your water heater for warm showers and dishwashing.
- Extend Antenna: Raise your antenna for better TV or radio reception.
- Test Water Lines: Turn on faucets to ensure all water lines function properly.
- Set up Furniture: Arrange interior furniture as desired for your comfort and convenience.
- Unpack Items: Remove items from storage and place them in their designated spots for easy access.
Using these steps as your guide, you can ensure that your arrival and setup at any campground go smoothly and efficiently. Combine this with our RV Departure Checklist, and you’ll have your entire camp setup and teardown process completely covered!
Better yet, we have put all of these steps into a simple-to-follow printable RV setup checklist that you can download, print, and reuse over and over as many times as you want!

These PDF checklists are easy to use and come with blank copies, so you can make them work for you and your RV. Get your RV Arrival & Departure Checklists today and take the hassle out of the setup and teardown process!
Common Setup Issues and Troubleshooting
No matter how well-prepared you are, unexpected issues can arise while setting up your RV.
Wrong Electrical Connection
In some instances, your RV’s electrical system might not match the site’s power source, which could lead to power issues. Always carry adapters for different types of electrical connections. Be aware of your RV’s power requirements to prevent damage to your RV’s electrical appliances and systems.
High-Pressure Water
An unexpectedly high water pressure can lead to damaged plumbing within your RV. To avoid this, always use a water pressure regulator when connecting your RV to a water source. This will ensure that the water pressure stays within a safe range.
Power Cord Doesn’t Reach the Pedestal
In certain situations, you might find that your power cord isn’t long enough to reach the campground’s power pedestal. Always carry an extension cord suitable for your RV’s power requirements to avoid such issues. Be aware that using extension cords can lead to power loss, so use them sparingly and only when necessary.
Uneven Leveling
An uneven RV can lead to unstable walking conditions inside and can even affect the functioning of some appliances. Always carry leveling blocks or consider investing in automatic leveling systems to deal with uneven terrain. Should your RV not appear level even after your initial setup, re-adjust and use your leveling system to correct this.
Water Leakage
Water leaks can cause significant damage to your RV. Always check your water system during the setup process to prevent leakage issues. Ensure all connections are tight and the seals are in good condition. If you detect a leak, turn off the water supply immediately, identify the source, and repair it. For securing the connections, consider using plumber’s tape for a more secure fit.
Slide-out Issues
Slide-out rooms in your RV can occasionally encounter problems. Whether they refuse to extend or retract, such issues can be caused by several factors, like low battery voltage, blown fuses, motor failure, etc. Understanding your slide-out mechanism and maintaining it properly can prevent such problems.


Write a comment