
Camper FAQs is reader-supported. Buying through links on our site may earn us an affiliate commission. As an Amazon Associate I earn from qualifying purchases.
Mold in your RV is typically caused by excess moisture and a lack of air circulation. When your RV or travel trailer is stored, that excess moisture can get trapped inside and feed mold growth for months on end.
So, the best way to prevent mold in your camper during storage is to keep moisture out of the camper and improve airflow, which we can do in a few different ways.
1. Inspect the Camper
The first step in mold prevention is to properly inspect your camper, inside and out, when you’re preparing it for storage.
- Inspect the exterior of the vehicle for entry points for moisture. Check the roof for any cracks or damage, around windows and vent seals for dried-out or damaged caulking, etc.
- Check for mold in the camper slide-outs, if applicable.
- Examine the RV’s plumbing, looking for leaks around the bathroom toilets, shower, sinks, water heater, etc. Mold can also grow in pipes and plumbing that are impossible to inspect, so blow out the water tank and plumbing lines to ensure the system is free of any moisture.
- Check interior vents, doors, and window seals for signs of moisture or mold. Even the fridge door seal can become moldy and potentially spread.
2. Store Your RV Indoors
You decrease the likelihood of water or condensation forming inside your recreational vehicle or trailer by storing your vehicle indoors, especially in a climate-controlled indoor RV storage unit.
Of course, this isn’t always an option. So, if you need to store your RV outside, use an RV cover that will help protect it from the elements and is breathable, allowing moisture to escape.
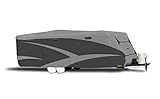
ADCO Travel Trailer RV Cover
Price:Clicking this link to make a purchase may earn us a commission at no additional cost to you.
3. Ventilate Your RV
As mentioned above, mold and mildew can form when excess condensation build’s up in your RV. When you open up the RV’s windows and vents, you allow fresh air to enter and moisture to escape. Proper ventilation is key to preventing mold from forming in your RV.
4. Run a Dehumidifier
If possible, run a dehumidifier in your RV regularly while it’s in storage to keep humidity levels under control and prevent excess condensation from building up.
5. Use a Moisture Absorber
A more hands-off way to remove excess moisture in your RV during storage, and one that doesn’t require electricity, are moisture absorbers like DampRid.

DampRid Fragrance Free Disposable Moisture Absorber for RVs
Price:Clicking this link to make a purchase may earn us a commission at no additional cost to you.
Simply pop the lid off the DampRid container and set it in your RV. It will absorb any moisture in your RV for 45 to 60 days. Depending on its size, you may need to place several containers throughout your RV.
6. Ventilate Under Your RV Mattress
This might seem like an odd place for mold to form, but it’s a simple tale of restricted airflow and trapped moisture. When mattresses are placed directly onto solid surfaces like plywood platforms, airflow is limited, and it becomes a party spot for condensation to gather, thus leading to mold.
To prevent this, you can increase airflow by using a breathable mattress, installing wood slats beneath the mattress, or even drilling holes in the plywood for extra ventilation.
Don’t forget to regularly inspect and clean the area under the bed – a little TLC goes a long way in maintaining a mold-free zone.
7. Inspect Your RV Regularly
Lastly, it’s important to inspect your RV regularly for any signs of mold, moisture build-up, or water damage while it sits in storage.
If you spot the signs of mold forming early, it will make it much easier to clean up and control.
Tip: If you find mold forming in your RV while in storage, be sure to find the root cause and fix it. This will help prevent mildew and mold from returning.
Also, be sure to check out our guide on how to keep moisture out of an RV in winter, especially if you use your RV or travel trailer in the winter months. There are a few additional and important considerations to keep moisture out and mold away.
Now, if you find mold in your RV, let’s learn how to get rid of it.
How to Get Rid of Mold in an RV
The most effective way to get rid of mold in an RV is to mix 1 part hydrogen peroxide with 1 part water in a spray bottle. Spray the solution on the mold and allow it to sit before removal. Wipe it up and wash the area with a household cleaning soap and water, then rinse.
Important: Wear protective gear – mask, gloves, long-sleeved clothing, etc. – when cleaning up mold. Mold can be highly toxic, so seek a mold remediation expert if you have a severe infestation in your RV.
But what about bleach to kill mold in my camper?
Bleach can effectively kill mold in your RV; however, prolonged exposure can cause severe irritation to one’s skin, eyes, lungs, and so on. Plus, bleach can have an adverse reaction when mixed with other cleaners like ammonia, drain cleaners, and other acids, releasing harmful chlorine gas.
So, while it works, I don’t recommend it.
You can also try one of the many other natural RV mold cleaners:
- Spray undiluted white vinegar on the mold, allow it to sit for 1 hour, then wipe the surface and air dry.
- Spray a solution of 2 tablespoons baking soda and 2 cups water onto the mold and let it sit for an hour. Scrub, rinse, and repeat one more time.
- Spray a mix of 2 teaspoons of tea tree oil with 2 cups distilled white vinegar onto the mold and allow it to sit for 1 hour, scrub, and air dry.
- Spray a solution of grapefruit seed extract (10 drops) and 1 cup water onto the mold and let it sit for 10 to 15 minutes, rinse, and air dry.
Some commercial mold removal products are also available, with one of the most popular ones being RMR Stain Remover Spray.
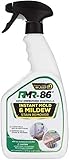
RMR Stain Remover Spray
Price:Clicking this link to make a purchase may earn us a commission at no additional cost to you.
RMR requires no scrubbing, is fact-acting, and is safe on multiple types of surfaces.
Write a comment