
Camper FAQs is reader-supported. Buying through links on our site may earn us an affiliate commission. As an Amazon Associate I earn from qualifying purchases.
The roof of your RV is one of its most integral features.
It’s the main component protecting you from the harsh elements outdoors: fog, dust, sandstorms, rainstorms and more.
This is why having a high-quality rubber roof on your recreational vehicle is of utmost importance.
If you’ve never done a rubber roof installation on your camper, this step-by-step guide highlights everything you need to get the job done quickly… and done right!
Tools and Materials Needed
- Rubber roof kit (I recommend the RecPro PVC RV Rubber Roof Kit from Amazon)
- Paint roller
- Ladder
- Screwdriver
- Putty knife
- Metal shears or saw (If removing a metal roof)
Although you can sand manually, I recommend using an electric sander. This will save you multiple hours of wearisome hand-sanding and scraping, especially if you have a medium to large camper. If you don’t have this tool, consider borrowing or renting one from a friend or neighbor.
Also important to note is that if your recreational vehicle is already equipped with a rubber roof, then there’s no need for shears. The only time you need shears is if you’re removing an old metallic roof before installing the rubber one.
How To Install Rubber Roof On Camper

Step 1: Remove All Vents, Hoods, & Housings
The first thing we need to do is remove any vents, vent hoods, and housings that are on the roof of your vehicle.
Vents and housings are fairly straightforward to remove. Simply unscrew them with a Phillips or a 1/4″ head screwdriver and use a putty knife to scrape off the old lap sealant and pry the vent or housing off the roof.
*Tip: If you’re reusing the vents or housings, be sure to carefully remove them so as to not crack or damage the base. And completely remove any old sealant from the unit.
Step 2: Remove Any Termination Bars, Strips & Caps
Next, we need to remove any termination bars, drip edges, strips, and caps from the roof of the RV.
You’ll need to use your putty knife to remove any lap sealant covering the screws, then unscrew and remove these components.
Keep in mind every RV is different – some use termination bars, some use caps, etc. – so inspect your roof carefully and remove the components that your particular model uses.
*Tip: If your termination bars or drip edges are held on using rivets, you can use a chisel to knock off the rivet head.
Step 3: Removing the Old Roof
Now, it’s time to remove that old roof!
If you have an existing rubber roof, you’ll just have to use your putty knife and start scraping it up.
In some cases, RVs have metallic roofs. If you’re dealing with a metal roof, be sure to wear protective clothing before you start using the shears or saw. It’s wise to wear gloves for hand protection and additional layers of clothing to enhance your safety.
*Tip: Park your truck or dumpster next to your RV so you can throw the old roofing material right into it.
Step 4: Cleaning the Roof’s Surface
Once you’re done removing the roof, the next step is to clean the surface where the old roof was placed. This step is crucial, especially if your previous roof was made of metal. Chances are all the drilling and cutting that took place during removal resulted in some shavings and chips being left behind.
If there are a lot of inconsistencies in your roof deck, you may want to consider sanding it and using seem tape to cover any gaps in seems. Sanding is important because it helps you create an ultra-smooth surface, which will help the new rubber roof to adhere better.
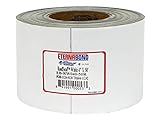
RoofSeal Sealant Tape
Price:Clicking this link to make a purchase may earn us a commission at no additional cost to you.
This is also the time when you want to replace any of the plywood roof foundation (if needed). Watch the above video for tips on how to best do this.
*Tip: Ensure that the deck of the camper’s roof is completely dry before you apply any glue. So if the deck is a bit wet from the cleaning process, give it ample time to dry before you apply any additional products.
Step 5: Adhering the New Roof
For this step, it might help if you have an extra pair of hands to help you. The easiest way to go about this is to do a portion of the roof at a time.
Start by placing the new rubber roof roll on one end of the roof. We are going to adhere the rubber roof in small sections (roughly four-foot sections) until we work our way across the entire roof.
Then using the paint roller, roll the adhesive onto the roof deck, covering about a four-foot section. Let the adhesive stand for a bit until it gets tacky, then roll the new roof membrane over the adhesive.
Smooth out the membrane so there are no air bubbles between it and the plywood.
Continue until the whole roof is covered and smoothed out. Cut off any excess roofing material with a utility knife.
*Tip: Use a stiff broom or a window mop to smooth out the membrane and remove air bubbles. Also, letting the membrane sit out in the sun for a while so it can “relax” will make it easier to work with and smooth those bubbles out.
Step 6: Cut Holes For Vents, Hoods & Housings
After the new roof has been laid, it’s time to cut out the holes for any vents’ hoods or housings you have on your camper roof. This can easily be done with a utility knife.
You’ll want to cut the holes in an “X” shape, so you can fold each flap down into the opening and screw it down.
Step 7: Reinstall Roof Components
Now we will need to reinstall any vents, termination bars, drip edges, strips, and caps. Once everything is in place, you can cut off any excess roofing on the sides with a utility knife. And cover any exposed screws, joints, and seams with lap sealant.
*Tip: If your RV used rivets to hold down any of the components, you may have to slightly move the component when reinstalling. And it’s a good idea to use screws in case you need to reinstall the roof again in the future (it will only make things easier).
And that’s it! You now have a new rubber roof!
We would highly recommend you use an RV cover to help protect your new roof from the elements when not in use.
How Much Does It Cost to Replace Rubber Roof on an RV?
The cost of a rubber roof will vary from one manufacturer to the next. Overall, vehq.com estimates that a rubber roof replacement costs between $300 and $325 per linear foot. However, how much you spend on a roof repair will depend on various factors, such as whether you’re doing the replacement by yourself or hiring a professional.
Leave any questions or comments below!
Write a comment