Camper FAQs is reader-supported. Buying through links on our site may earn us an affiliate commission. As an Amazon Associate I earn from qualifying purchases.
Low water pressure is a frustrating, albeit common, issue in RVs.
Have you ever tried to rinse the shampoo out of your hair with little to no water pressure? (Hint: it’s not fun)
Surprisingly, troubleshooting the issue isn’t as challenging as you might think.
So, here are a few pro tips on increasing water pressure in an RV… you know, so you can finally rinse that shampoo out of your hair!
Why Do You Lose Water Pressure in Your RV?
There are several causes for low water pressure, so the first step is to determine the source of the problem. That means checking to see if the issue lies with the park’s water supply or something else.
Check the RV Parks Water Pressure
If you’re connected to the city water supply at your campsite, your water pressure decrease may be a result of the park’s system.
If you suspect it’s the park’s water pressure, the easiest way to tell is to check your water pressure gauge if you have one. If you don’t, a water pressure regulator with a gauge is highly recommended. Knowing your exact water pressure is always just a quick glance away. Plus, the regulator will help protect your RV plumbing system from high-pressure city water supplies.
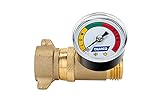
Camco Brass Water Pressure Regulator with Gauge
Price:Clicking this link to make a purchase may earn us a commission at no additional cost to you.
If you don’t have a water pressure gauge, it’s still fairly simple to tell if the problem is with the park’s water system:
- Ensure that your freshwater tank is more than half full.
- Disconnect your water line from the park’s system.
- Start your RV’s onboard water pump, and turn on a single faucet that’s furthest away from the pump.
If your water pressure seems better than it was when hooked up to the campground’s line, the fault lies with the park’s water system, not your RV.
The takeaway? If your RV water pressure is low on city water, simply fill your freshwater tank and use that system.
Check the Water Hose
All it takes to lose water pressure is a bent or twisted hose.
Check to see if the hose connected from the park’s water supply to your RV inlet is bent, and straighten it if necessary.
If it did have kinks, you’d immediately notice that your water pressure has increased once these bends straighten.
Ensure No Leaks in Water Lines
Inspect your RV’s water lines for cracks, loose clamps, leaks, etc.
An easy way of checking for these leaks is by looking through your cabinets and panels. If you notice drips or pooling water, you’ll need to replace the waterline.
How To Replace An RV Water Line
A lot of newer RVs use PEX pipes for the water lines. Older models often use copper lines. I recommend using PEX, even if replacing an old copper line.
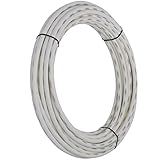
SharkBite PEX Pipe 1/2 Inch, Flexible Potable Water Line
Price:Clicking this link to make a purchase may earn us a commission at no additional cost to you.
- Measure the length of the line to be replaced.
- Ensure that your new line’s diameter matches the current one. 1/2″ is common, but double-check yours first.
- Turn the water pump off.
- Remove the old, damaged water line.
- Attach the new line using the appropriate water line fittings.
- Turn the water pump back on and test for leaks.
Check the Water Pump
The water pump is responsible for pumping from the tank and distributing water to the various fixtures. If something is wrong with the pump, it will immediately affect your water pressure.
The water pump in a recreational vehicle works on a flow rate, which is the gallon capacity of water produced per minute. One of the ways to slow the flow rate is by connecting the RV pump to the distribution system. The water travels slower because it has to go through more fittings and pipes before it comes out of a faucet or another outlet.
When a water pump works properly, it can pump out 3.5 to 5 gallons of water per minute. You can use a pressure gauge to test the water pressure. The pump’s average pressure should be between 40 and 50 pounds per square inch (PSI).
You can also adjust the RV pressure regulator. The standard factory setting is 45 PSI, but it is easy to change. All you need to do is to use a flathead screwdriver to shift the screw on the side of the regulator.
Important: You should know your RV’s pressure limitation to ensure you don’t set it too high. With some new RV models, the PSI limit is 60.
If the pump has malfunctioned, you should troubleshoot the problem as soon as possible. In some cases, it might be necessary to replace the water pump to restore normal pressure. When replacement becomes necessary, consider upgrading to a reputable brand water pump with at least a 1-year warranty.
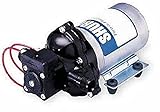
Shurflo Fresh Water Pump, 3.5 GPM & 45 PSI
Price:Clicking this link to make a purchase may earn us a commission at no additional cost to you.
Check the Water Filter
Apart from the water pump and the lines, you also need to ensure that your water filter is in good working order. The water filter is just as important as the other elements, as a defective filter plays havoc with your water pressure.
A clogged filter will cause your water pressure to decrease because it interrupts the pathway to fixtures and faucets around the RV. You may need to replace it to restore your water pressure if you don’t find any other explanation for the problem.
Always ensure your filter is clean (and you should do that before every trip). If you’re not going to check your filter regularly, the least you should do is replace it every six months or when you de-winterize your camper.
Some filters can supply fresh water for a year before replacement, but if a filter gets dirty or damaged during a trip, you might not have an opportunity to fix it on the road. Keep a spare in the RV and avoid the inconvenience on your next trip.
Tip: To help keep the filter clean, it’s essential to maintain a sufficient water level within the freshwater tank. You should never let it run dry, as that allows any accumulated sediment in the tank to clog the water filter. And be sure to sanitize your RV freshwater system regularly.
Check the Water Storage Tank
Lastly, and we’re just adding this one for good measure, if you have little to no water coming out of your shower or sink faucets, the issue might not be the water pressure… it could be the freshwater tank ran empty.
This happens. And it’s not exclusive to RV beginners or owners with a small water tank. It’s easy to forget about the tank’s water level when focusing on driving, navigating, supplies, and so on.
Simply fill the RV water tank with freshwater and be on your way.
Write a comment