Camper FAQs is reader-supported. Buying through links on our site may earn us an affiliate commission. As an Amazon Associate I earn from qualifying purchases.
Ready access to a source of clean water is an essential part of RV travel.
When you’re not hooked up to an external water source, your freshwater tank is what you’ll use for daily tasks, like cooking, showering, and so on.
In this guide, you’ll learn how to fill an RV water tank with fresh water and how to keep it clean to ensure your water is always fresh!
Filling Your Freshwater Tank
Step 1. Understanding The RV Water System
If you’re a new RV owner, a wise first step in your inevitable maintenance journey is familiarizing yourself with all the systems in the vehicle.
All campers have variations in design but will almost always include a mechanism for delivering clean water and disposing of used water.
Typically, on the underside of the vehicle, there will be two to three water tanks. Every tank has a separate function, so it’s important to know how to maintain each one properly:
- The Freshwater Tank is where you’ll store the clean water that’s used by your camper’s faucets, shower, and toilet.
- The Grey Water Tank is where used water from your shower and sink is carried when it drains.
- The Black Water Tank is where wastewater from the toilet is stored (until you empty it). If an RV doesn’t have a grey water tank, all used water will drain into the black tank instead.
Here is a super quick video explaining exactly how the water system works in an RV.
Step 2. Locating The Intake Valve
Your RV’s fresh water tank will most likely come equipped with an electric water pump that pushes clean water through the camper’s water lines. To get potable water into the tank itself, you should first locate the intake valve, usually attached near the reservoir.
There are two ways an intake valve could be set up:
- There could be two separate connections for “local supply” and “city supply.” Attach a water source to the local supply, and it will fill up the freshwater tank. Attach it to the city supply, and the tank will be bypassed to use the water source directly.
- The second option is an intake valve with one connection and a lever that allows you to divert the flow of water, either to the tank or your camper’s plumbing.
Step 3: Attaching The Hose
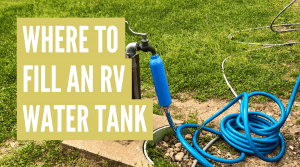
Once you’ve identified where the intake valve is, we simply need to connect our potable water hose to the water source spigot and run it to the RVs intake valve.
Make sure that the hose you use is specifically designed for transferring potable water. The hose is generally white or blue in color.

Camco 25ft Premium RV Drinking Water Hose
Price:Clicking this link to make a purchase may earn us a commission at no additional cost to you.
Important: You’ll want to keep the water fill hose separate from the hose you use to drain the grey and black holding tanks to avoid contaminating your drinking water.
If you have trouble connecting the hose to the spigot, you can use what is called a water bandit. This handy little connector allows you to connect your water hose to unthreaded faucets or those with stripped threads.

Camco Water Bandit
Price:Clicking this link to make a purchase may earn us a commission at no additional cost to you.
Once that hose is connected to the water source, run the other end to your intake valve and slowly turn the water on.
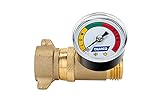
It’s advised to use a water pressure regulator if you don’t already have one attached to your hose to protect your RV plumbing from damage caused by a high-pressure water spigot. They are also useful when you experience low water pressure issues by quickly identifying if the city water supply is the root of the problem. Checking this gauge is step 1 in our tips to increase water pressure in an RV.

Camco Brass Water Pressure Regulator with Gauge
Price:Clicking this link to make a purchase may earn us a commission at no additional cost to you.
Tip: We also highly recommend you connect a water filter to your hose before you fill your tank. This is optional, but it will help remove any bacteria and contaminants from the water before they reach your tank. This will help keep the water fresh and safe to drink.

Camco TastePure RV Water Filter
Price:Clicking this link to make a purchase may earn us a commission at no additional cost to you.
Step 4. Deciding How Much Water You’ll Need
How full you fill your tank will depend on a few factors.
You won’t need to fill the tank completely if you are parking at RV campgrounds most of the time. Your camper usually has a “city” connection that allows it to use water from a public supply directly. Frequent use of that source only requires enough water in the tank to use while out on the road.
If you’re boondocking or traveling somewhere without public water hookups, it’s not a bad idea to fill up your freshwater tank to the brim. The average RV can hold around 20 to 100 gallons of water, with every gallon adding up to 8lbs of weight to the vehicle. A full tank may have a substantial effect on your camper’s speed and fuel efficiency, so it is best to take this into consideration for long road trips.
Plan ahead before traveling and take into account the length of the trip, the number of travelers, and where you will fill your RV fresh water tank along the way to make sure your water needs are met. If you keep a careful eye on water levels and stop frequently enough to top up the low tank, it should be more than enough to keep the water flowing for your entire trip.
Important: Water in your freshwater tank will only remain “fresh” for a certain period of time before it needs to be changed. Check out our guide on how long you should keep fresh water in an RV tank for more information.
Cleaning Your Freshwater Tank
Learning how to fill up your RV’s fresh water tank is only a sliver of the responsibilities that come with caring for your camper and its water systems.
Another vital task is ensuring that your water remains potable by regularly cleaning and sanitizing the fresh water tank to remove bacteria and algae.
When You Should Clean The Tanks
You should clean your freshwater tank in any of the following scenarios:
- Immediately after purchase. A new RV could have been sitting in the lot long enough for bacteria to accumulate, and it’s necessary to flush it before using it for the first time. A used RV should also be thoroughly cleaned to mitigate the chance that the previous owner never did it themselves or did so infrequently.
- If you notice a foul odor emanating from the faucets or drains.
- While de-winterizing your camper. It’s good practice to clean out your freshwater tank after pulling it out of storage. For example, as part of your camper de-winterization process.
- After prolonged use. If none of the above scenarios fit you, then be sure to clean out your tanks at least once a year.
How To Clean The Freshwater Tank
We cover this step-by-step in our guide on how to sanitize an RV freshwater tank and lines, so check it out. More importantly, that article has tips on what NOT to do when sanitizing your tank.
For brevity sake, the process for cleaning the water tank and lines is simple:
- Fill The Tank. First, drain the fresh water tank and turn off the water heater. Then, fill up the freshwater tank to three-quarter capacity, adding a quarter cup of bleach for every 15 gallons.
- Let It Sit. Turn on the faucets and shower for a few minutes to ensure that the solution is circulating through the system. Then, turn everything off and allow the mixture to sit for at least 12 hours. If possible, drive your RV around so that the mixture sloshes around and thoroughly coats the inside of the tank.
- Drain It. Lastly, open the faucets again and let the water drain before you fill it up with a fresh supply. Keep the faucets open and flush the system with potable water until you no longer smell bleach. You may have to repeat this a few times to ensure that no bleach remains inside the tank before you drink from it.
Now, your freshwater tank is clean and ready to be used again!
FAQs
How do you know when your RV water tank is full?
You can tell when your RV water tank is full by either watching the water-level gauge (if your model has one), listen for water coming from the overflow (if you fill using the city inlet), or if you have a gravity fill, the water will splash back.
Also, if you can see your water tank, then you can actually watch it fill up and stop it exactly where you want it.
How long does it take to fill an RV fresh water tank?
This will depend on the size of the tank and how fast the water flows. But, a good rule of thumb is about a gallon for every 15 seconds. So, an 80-gallon freshwater tank will take roughly 20 minutes to fill.


I researched my Grand Design Imagine XLS 22 MLE OWNER’s manual and multiple You Tube sites looking to find why I am told to drain the Fresh Water Tank (FWT) via the external drain during Dewinterization and water supply sanitation processes?
I understand I am attempting to rid the tank and water lines of first the anti-freeze followed by the chlorine/ bleach mixture, however the FWT holds 36 gallons of water. Who wants that draining on the ground at my driveway or via a sewer hose to the campground drain if, as I planned, I drained the tank at the first campground I use in the Spring.
Am I missing something?
Thank you.
Good question! RV anti-freeze is non-toxic, at least the ones I use, so I guess I wouldn’t be worried about that. The bleach is very diluted – we’re talking 1/4 cup per 15 gallons – which is less than some use in their washing machine. If you’re concerned, I would just dump it at a local dump station, where it’ll end up getting treated at a wastewater plant.
I use a water meter on my hose to know when the tank is near full. You can find them on Amazon for like $15 bucks. It tells you how many gallons of water has come out the hose.
Good tip! Thanks Sheryl